
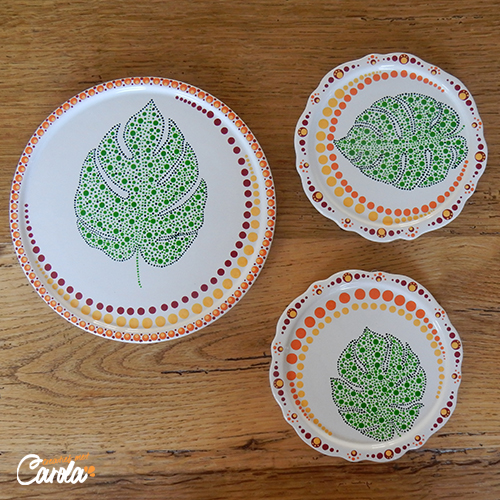
When I got married we had the monstera leaves on our invitations. During our honeymoon we got to see it in the wild. So it is obvious that we now have this gorgeous plant in our living room. It is safe to say that, because of our wedding day, we started to love this plant. Time to get the dotting materials out and start dotting!
Requirements
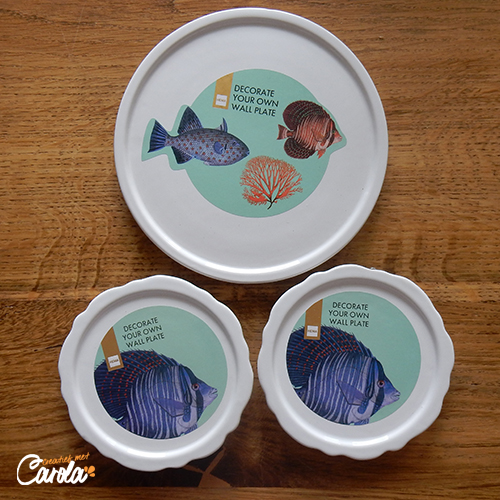
1x Wall Plate 20 CM
2x Wall Plate 15 cm (the ones I used are no longer available)
Pictures of Montera Leaves printed, I used these.
5 colors of porcelain paint to your choice.
Washi Tape
Templates 100 mm
Dotting sticks (I use the ones from StipStijl)
Elaboration
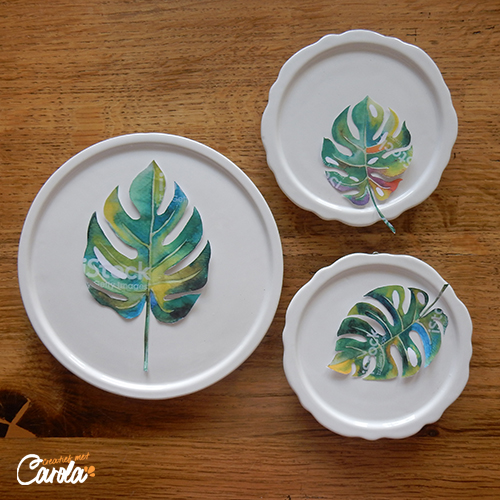
I started with measuring the plates. In InDesign I created circles with the same measurements. Next I pasted the picture of the leaves into the circles and adjusted them to right size. It is OK if the image gets blurry. Print out your leaves and cut out.
After I cut out the leaves and cleaned the ceramics with alcohol I used Washitape to stick them to the plates. Over the leaves I also sticked the 100mm and 160mm templates. With stick number 5 I’ve added dots until this size was to big, then I used stick 3 (3 on both sides) and then I’ve added 4 more dots on each side with stick 2. Carefully remove the template.
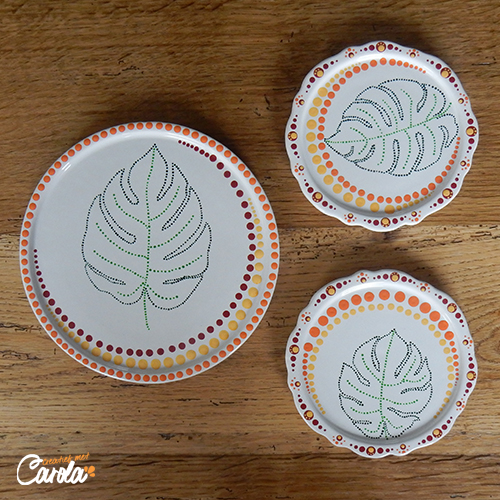
Next up is making the edge of the leaves. Use stick size 0,5 and put dots next to the edge of the paper. Repeat this process on all plates and grab stick number 4. Now you will continue with the circle around the leaves. This way you fill up your plate. When stick number 4 is to big, use stick 2 and place 3 dots on both sides, followed by four dots with stick number 1. If you want to, you can fill up the raised edge of the plates with dots. Or leave them empty. I used stick 3 with the rounded plate and on top I used stick 2 in the bottom stick 1. With the shaped wall plates I used stick 1,2,4,2,1 and in the corners stick 4. In the middle dot I used stick 2 for an extra layer and add 3 dots above with stick 1.
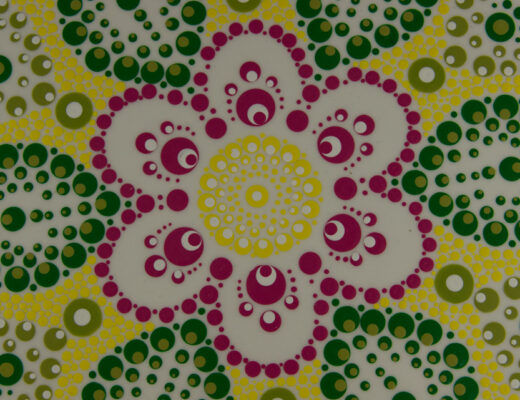
Now you are going to fill up the leaves. The biggest dot I placed is size 4. I just put them on random places within the leaves. Because my border is in a darker color, I used stick 0,5 and this color while filling up the leave.
After the paint dried for at least 24 hours you can bake it in your oven. Do this at 145 degrees or 293 Fahrenheit. Put your ceramics in the oven while it is heating up. After the oven is on full power, bake it 45 minutes. Let the ceramics cool down inside the oven.
It is not allowed to reproduce this pattern or use it for your own commercial goals. Do you want to use my pattern for commercial goals? Please contact me! I am always open to new collaborations.
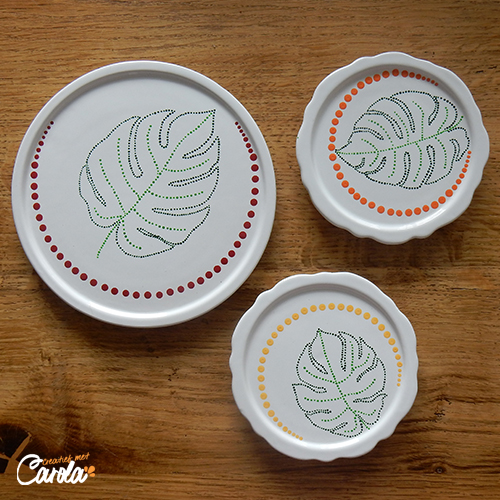
Result
Follow me!
Facebook, Instagram, Pinterest & YouTube!
Share your results with the hashtag #creatiefmetcarola or tag me @creatiefmetcarola. I’m curious to see your beautiful results.

No Comments